It’s a nightmare scenario for all of us. One minute you’re chugging along on an article or paper, and suddenly your hard drive starts making funny noises before your screen turns black. No matter what you try, your computer doesn’t restart. Or, you host a dinner party and play some music off your trusty laptop that contains all of your research; a guest trips over the power cord, sending your computer flying.
Chances are, you will experience catastrophic data loss at some point in your academic career. Whether by hard drive failure, an errant liquid spill, theft, or any of a thousand other reasons, our data is exposed to risk of loss. For anyone, losing data is bad news; for an academic, it’s a disaster. However, this is a disaster that you can prepare for. This article will guide you through the process of creating a robust backup system. While it may take a few hours to set up and some upfront financial investment, the end result will be a backup system that you can access from anywhere, and one that you never think about until you need it. With this system in place, you will make it through data loss with only minor interruptions to your work. Think of it as your data’s guardian angel.
In this article, I’ll be following the old data storage axiom 3+2+1, which means having three copies of a file in two formats, and one offsite storage site. As much as possible, this system also automates work and builds in redundancy. Remember: it’s only overkill until you lose data. It’s better to lose a day of work than your whole archival trip, and better to painfully lose two weeks of research than your entire dissertation.
Component 1: External Drives
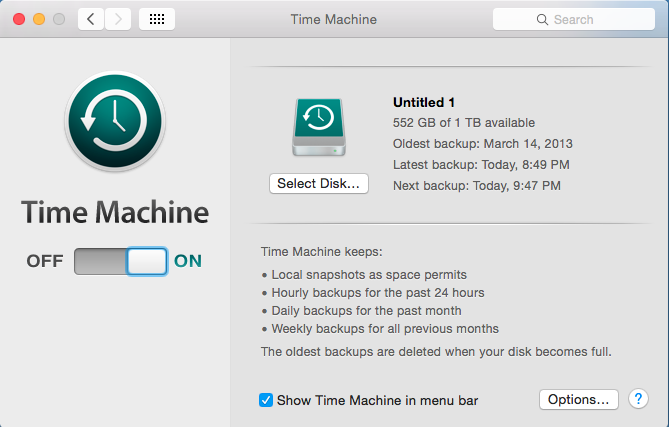
External drive(s) will form the base of your backup system. Mac users already have the excellent TimeMachine program to automate backups; Windows 7 and later users have a similar program in their Control Panel. Set up your program to make hourly backups. As long as you have the drive connected to your computer, the program will make backups without any prompting from you.
External drives are great for daily backup because they’re easy and fast to access. If one version of a file gets messed up, you can recover it within a minute even if you’re in a place without internet service.
For Mac users, TimeMachine has the ability to back up to multiple drives. External drives are cheap enough now that while you can certainly start with one, you should plan on eventually buying at least two. Keep one at home, and one in your office. A USB hub allows you to run backups to multiple external drives at once.

USB Hub and Multiple External Drives
If you are embarking on a long archival trip, consider using three drives. Keep one at home, one at your hotel/cousin’s couch, and take one with you to the archive and continuously back up to it; you will plug in the second external drive when you arrive home at night. If you lose your laptop while traveling, it’s very possible that you will also lose your external drive—for example, if you lose your laptop bag on a taxi or airplane ride. Having a second external drive separate from the first allows you to quickly restore the contents of your computer. When traveling, make sure you carry the drives in separate locations, e.g., one in your carry-on and one in your checked luggage.
Component 2: Cloud Backup Services
Local storage only fulfills part of our 3+2+1 rule. You’ll still want some sort of offsite storage for your data because chances are decent that if, say, your city floods or you get a nasty computer virus, your local storage will fail. You might also one day get into the scenario where you have a hardware failure and can’t fix your USB ports for a few days or weeks. This is where an online cloud service devoted to data backup comes in.
I’ve been using the excellent Crashplan service since January. It’s an easy, set-it-and-forget-it program that backs up your data to their servers every fifteen minutes. It copies and uploads your entire drive and backs up hourly, even as you watch a House of Cards marathon. Erstwhilean Sara Porterfield uses Backblaze, a similar service. Although the initial backup on either service will take up to a week on a fast connection (you’ll want to use an ethernet connection instead of wifi), you’ll never have to think about it working until you need to retrieve a file; it just works. Seriously, it’s almost magical.
Using a fully automated service such as Crashplan or Backblaze is the solution you want if you’d rather devote your mental energy to interpreting documents or what to cook for dinner than to remembering to backup your files each day. Crashplan is the service that I would recommend for family and friends who lack technical savvy. Crashplan costs $60 a year to run, though there are usually discounts around the winter holidays, and you can share a plan with friends or family members for $150 a year. Backblaze costs $5 a month.
The drawback of cloud backup is that you’ll need an internet connection to backup and retrieve files. Chances are good that you will encounter spotty or very slow internet service while traveling; backing up to an external drive or drives is faster and more reliable for both backup and retrieval. (Tip: if you’re traveling without regular access to wifi, Starbucks is a reliable source of speedy internet.) Fully restoring a computer from a cloud backup would take days. Because of this, you’ll still want to have external drives in case you ever need to restore your computer, or to transfer files when you get a new computer. If you happen to lose your computer, all your external drives, AND the Crashplan/Backblaze servers fail simultaneously, it will be unlikely that the security of your data is still a major concern. If you simply regularly run TimeMachine on multiple external drives and use a file backup system such as Crashplan, you will have a robust system that requires very little input from you, leaving you more time to think about big ideas (okay, dinner plans) instead of thinking about data loss.
(Why Not) Component Three: Dropbox or Google Cloud
You may hear people recommend cloud sharing services such as Dropbox as their backup storage. Don’t listen to them. Unlike Dropbox or Google Drive, services such as Crashplan and backups from TimeMachine support versioning, meaning that you can restore a previous version of your document, such as the one that existed before your cat walked across the keyboard and hit a magic combination of keys. These cloud-syncing services are not what you need for backing up, because they preserve the changes you or others make to files as the only version. Services such as Dropbox are intended for collaboration or instantaneous access and to make sure that changes are saved across documents. As a consequence, there’s very little recourse when a file gets corrupted or if your five year old decides to delete some files. Moreover, backing up to these services takes mental effort—you must remember to back up, which, after a long day staring at half-decayed eighteenth century documents written in a shaky hand, tends to take too much mental effort. These cloud-syncing and sharing services are best left for collaborating on and sharing documents.
(Ultra Optional) Component Four: Creating Multiple Formats
Backing up to the cloud fulfills the necessity of two formats and one off-site storage. If you are truly paranoid about data loss, the next step is to run your files through Automator and create a PDF copy of all of them so that they are also in a different file format. You can also convert all of your text documents from Word or Pages into plain text files. The ultimate standard for backing up and being able to read your files a few centuries from now would be to print everything out on acid-free paper and store it all in acid-free boxes in a fireproof, insect and rodent-resistant location safe from water damage. Presumably, if you are thinking this far ahead, you do not need to read this article.
TL;DR
Run TimeMachine and Crashplan and thank us for it later.


